Friday, March 27, 2009

Vimeo


When talking about uploading and sharing of videos online, the vast majority of people automatically think of YouTube. However, YouTube is definitely not the only site which offers these online services. Another popular site (especially in the US) is Vimeo.

Vimeo is a video-centric social networking site, launched by InterActiveCorp in 2004. Its name, "Vimeo", is, in fact, an anagram of the word "movie". The site hosts around 13,000 video uploads daily, 10% of which in HD. Most notably, the White House regularly uploads HD versions of Barac Obama's broadcasts on Vimeo.

Although Vimeo is primarily used to upload videos, its core purpose is very different from that of YouTube. It is not commonly used to download music videos or cartoons or excerpts from movies. Vimeo is essentially a social networking site, where people of similar interests can create groups and upload instructional, demonstrative or simply entertaining videos. It offers a somewhat safer, cleaner environment in which to work with our students.

Getting Started

Although anyone can access Vimeo, it is always best to create an account first (otherwise you will find yourself locked out of many features). When signing in for the first time, it will ask you if you want to link you Vimeo account with your own Facebook account for convenience - I did, of course :) When you first log in, your display should look something like this...


On the top right hand side of the screen one can find the Menu Bar with a series of drop-down menus. Clicking on Me will allow the user to edit the Home Page, Profile, Settings and Contacts. The Me menu will also allow the user to engage in private messages and conversations with their contacts on Vimeo. From the Video menu one can, apart from uploading Videos, manage Albums, Groups, Channels and Subscriptions. Alternatively, to upload a video, simply click on the Upload menu.

Uploading Videos

To upload a video, simply click on the Upload Video button. Vimeo offers the user the possibility to upload up to 500MB of videos every week (including HD). Videos can be tagged so that they are labelled and more easily found. Altough it allows users to share videos and to download each other's videos, its rigid privacy settings mean that the users can decide if they want their video to be available for others to watch or download from the site, or not. In other words, uploaded videos can be kept totally secret from the general viewing public. Users may opt to use Vimeo purely to keep a backup of their videos.

This short screen cast was developed by the Vimeo team, and shows how one may upload a video and keep it private...


Additional Features

Below is a list of some additional stuff that can be done with Vimeo. To learn more about these features, click on the Explore menu on the top right hand side of the screen.

Groups: Creating a Group in Vimeo is like creating a mini community within Vimeo of people with common interests like yourself. Within a group users are able to share and discuss videos, music, photos, events, etc. (When searching Groups, I managed to find a good number of teachers' groups).

Channels: A simple way to showcase videos is to create a Channel where your viewers can watch your creations.

Projects:  Users here can discuss ongoing or future audio-visual projects they wish to embark upon.  It is also a sort of forum, where the users may engage in discussions about technical issues, requested features, general discussions about videos, etc.

Toys: Vimeo Toys are discovery applications that enable users to check out the latest videos and activity on the Vimeo service. Vimeo Land is a cartoon-style 2D world, while Pulse is one huge collage of all the videos being uploaded in real time. Users can actually engage in and create their own "Vimeo Toys".


As one can see, there is more to Vimeo than just uploading and sharing of videos. It is more of a specialised community of people who share videos and ideas with each other. It is very, very different from YouTube, and do take my word for it. It can be safely used to upload children's content videos online and embed them into a Blog or even on Skola portal. Try it out at http://www.vimeo.com/

Thursday, March 19, 2009

Google Apps

When someone hears the word ‘Google’, the usual response would be to think of the popular search engine, or, maybe, the familiar online webmail, Gmail.  However, in recent years, Google Inc has truly evolved and offers an array of online Applications (Google Apps), most of them available to use for free on the Internet. 

History

In January 1996, two Ph.D students at Stanford University, Larry Page and Sergey Brin, started Google as their part of their research project.  Originally the search engine used the Stanford University domain (google.standford.com).  The domain name google.com was registered in September 1997.  At the time, their offices were a mere space in a friend’s garage in Menlo Park, California – a far cry from their multi-million Googleplex headquarters in Santa Clara County.  Apart from the hugely successful Google search engine, the company now encompasses dozens of applications (of which Blogger, which hosts this very blog, and Picasa, about which I wrote in January). 

It is not possible for me in this article to go into detail about all the available Google Apps; however I will give a quick overview of the two most popular Apps: Gmail and Google Docs. I will cover other popular Google Apps in due course. 

Gmail and Chat

This is, of course, where it all begins – creating a Gmail account will automatically open the doors to a myriad of other applications available on Google.  If you haven’t yet set up a Gmail account, you can do so at http://mail.google.com.  Gmail provides the registered user with a 7GB (and growing) of storage facility.  It also boasts a powerful SPAM filter which deters the accumulation of SPAM e-mails in your mailbox.   However, there is more to Gmail than just storing your e-mails.

For starters, e-mails are grouped together in Conversations.  The reply to a particular e-mail is automatically grouped with the original e-mail.  Subsequent replies will also be added to this Conversation Bubble.  Each new e-mail can create a new Conversation and Conversations are searchable.  Longer Conversations, with many replies, are shown in short format for ease of retrieval.  This is quite different from the usual html-style layout of other web-based e-mails or Outlook.

More than e-mail…

Google Calendar:  Gmail has its very own Google Calendar, accessible on http://calendar.google.com.  It allows the user to organise events and set reminders (which can be sent regularly to a Gmail account).  After the initial set-up process, any additional changes to appearance or events can be accessed to from the Calendar tab on the top-left hand side of your Gmail toolbar.  Calendars may also be shared – either made 100% public, or just to selected contacts – by clicking on the drop-down menu next to your Calendar name, on the left hand side of the screen.  A user may opt to have more than one calendar (for different areas of one’s life, if the need arises).

Lables:  A unique feature of Gmail is the ability to sort e-mails by using Labels.  Labels work rather like Tags, and allow the user to group e-mails together by subject (for example, you might have a label for Work e-mails; another label for Joke e-mails, and so on); thus making retrieval of information easier.  Labels can be created and edited by clicking on the Settings tab and then on Labels.  Accidentally deleting a label will not delete e-mails associated with that label.

Google Talk:  Gmail also has an in-built chat program  - Google Talk  - similar in concept to other IM’s such as MSN or Skype.  Although basic in both features and appearance, it allows users to interact effectively with each other, both with short texts and even with video calls.  One may choose to either Save the chat history or go Off The Record.  Chat settings – including settings for video calls – can be accessed from Settings > Chat.

Google Docs

In an ever-changing world, portability is of essence.  Google Docs allows the user to create, upload, access and edit documents from anywhere (at least, where a connection to the Internet is available).  Google Docs enable users to:

  • Create and edit documents, spreadsheets and presentations online;
  • Upload documents directly from their Inbox;
  • Easily share documents with others, without the need of sending multiple e-mails

To create a document from scratch, go to http://docs.google.com (remember, Gmail registration is required first!) The user friendly interface will allow you to create your desired document in no time – simply click on New, choose the type of document required, and start away!  If, on the other hand, you already have a typed document that you want to share, simply click on the Upload button and upload the document in much the same way as you would add an attachment in an e-mail.

Amongst the obvious advantages of working with Google Docs – mainly the portability and the possibility to create online backups of your work – are the ability to bring people together and collaborate on an online project.  Multiple persons can work on an online document simultaneously – and tracks can be kept of who edits what, and when.  I have included this short video from The Common Craft Show, which illustrates the most salient uses of Google Docs “In Plain English”…


For more information about Google Apps, visit:

http://mail.google.com

http://www.google.com/talk/

http://www.google.com/apps/

http://docs.google.com

http://calendar.google.com

More information about other Google Apps will be uploaded shortly on this very blog.  Stay tuned J

Sunday, March 1, 2009

Animoto

Animoto is an online service, enabling the user to create unique trailer-like videos which can be shared with other users. The application also enables the user to upload a soundtrack to accompany the photos. Its creators claim that the ensuing video takes into consideration the music’s genre, rhythm and tempo to generate a trailer that takes into the song’s nuances.

Animoto was founded by a New York based company, with previous experience in the entertainment industry. In March 2008, The Animoto Videos application was launched on Facebook and became a popular way for users to showcase their photos on this social network

Getting Started

The first time you log onto Animoto, you will be asked to sign in with an active e-mail account. After signing in, log onto your
e-mail in order to activate your newly created Animoto account. Upon logging in, click on Choose your Video Type to start your project. There are two types of videos on offer: the Animoto Short 30 sec Video or the Full Length Extended Video. While the former is free of charge, the Full Length version can be created only against payment and requires the user to purchase Video Credits (from the website).

Uploading your Images

Animoto will let you use images from one or more of the following locations: from your computer, from online sources or from its very own digital library, which contains a good selection of stock photos and images and are great for getting started or for introducing Animoto to students. Click on the Images tab to start uploading. You will also be given the choice to rotate, highlight or move your pictures along the timeline, but sadly, nothing else. If you wish to edit or crop your pictures, you must do that before you upload them on Animoto.

Adding Music

After choosing your images, you can then proceed to upload a suitable soundtrack to go with your slide show. Click on the Music tab in order to choose your preferred music. Once again, Animoto has a good array of pre-loaded music tracks, however it also lets you upload music of your own. (Animoto's creators claim that, when the final slide show is being generated, it takes into account the music's genre and tempo to generate a trailer-like video, and that is why users don't have the option to set their own transitions and/or animations).

Your Video is served...

After the images and music have been uploaded, its time to click on the Finalise Tab and generate your video (this might take some time, especially on slow connections). In the case of Animoto Shorts (i.e., the freeware version of the application) one cannot have a tangible copy of the video on the hard disk (for example, as with MS PhotoStory or Picasa Video). The video will actually only be "saved" in cyberspace. However, the video will be available for viewing on the user's Animoto account. To share with others, one can:

  • click on Send video to friends icon, so that your friends will receive a link to the video by e-mail;
  • click on Post/Embed Online to post your video on a website or blog;
  • click on Export to YouTube icon to upload the video on YouTube;
  • click on iPhone Options to send the video to an iPhone.

So, although one cannot actually have a downloaded version of the video on the hard disk, there are many ways to share an Animoto video with others. Animoto's strength lies in its user friendliness and the ability to easily share your creation with others, without having to leave the application or hog your or your friend's mailboxes with too-large attachments.

Below is my very first Animoto Short video. For more information about Animoto, go to http://animoto.com/

Wednesday, February 18, 2009

Tagging and Uploading Photos: Introducing Flickr

Flickr is an online photo and video management application, used for editing, organising and uploading digital images online. It was developed by Ludicorp, a Vancouver-based company that launched this application in February 2004. In 2005, both Flickr and Ludicorp were acquired by Yahoo! Flickr has since undergone many changes in both appearance and interface. The latest version (Flickr Gamma) was launched in May 2006.

Flickr requires a Yahoo! account to sign in, and it’s a free and easy way to share photos with friends. When logging onto the website, you will be prompted to sign in with your Yahoo ID, or, alternatively, create a new Yahoo e-mail account to be able to log onto Flickr.


Upon loading, you will be greeted with your own personal Flickr page. There are also various upload choices available, both for beginners and for more advanced users. One can upload:
  • via the Flickr Uploader (available for both PC and Mac);
  • via iPhoto, Aperture, or Windows XP plug-ins;
  • via Flickr upload web page;
  • via email via various free third-party desktop programs;

Uploading Photos (through Flickr Uploader)

The easiest way to upload photos in Flickr is through its very own Flash uploader. When you sign in, you will see your Photostream on the top right hand side of the screen, and the Upload link on the top left. Click on Upload to start uploading your pictures in 3 simple steps: first choose your photos, then upload, and finally edit them. (After uploading, you will be able too see them in your Photostream – see above). When uploading, remember that you can decide who will see your photos: you can either make them public (can be viewed by anyone logging onto Flickr) or private (viewable only to those you choose).


Problems with uploading?

At times, you may not be able to work with Flickr’s flash uploader. This can happen for a variety of reasons: the most common being that you do not have the required flash plug-in or your Internet browsing security settings are set too high. If you do not wish or cannot rectify this, click on the basic uploader link which will let you upload your pictures in much the same way as you would send an attachment in an e-mail. Slow, but does the trick.

Tagging your photos

Once your photos are online, you may wish to tag them. Tagging a photo means giving it a sort of label or short description, so that you or other persons may be able to search for the photo more efficiently. To tag a photo, simply select a photo in your Photostream and click on Add a Tag (on the right hand side of the screen; just underneath your photo’s thumbnail.)

While up to this point, this process is similar to other tagging features available on other photo management applications, Flickr can then take tagging into a whole new level: it lets you select parts of the photo and tag different parts of it with different words. For example, if you upload a photo of a street lined with houses, you would be able to tag each individual house and perhaps input the name of the family who inhabits it. The same goes for group photos: Flickr lets you pin-point the individuals in the picture, one by one.


With Flickr, tagging becomes a visual process: the tagged parts of the photo will be encircled and the tags clearly visible on different parts of the picture, creating interesting compositions. This is known as adding notes. To add a note to an uploaded picture, simply click on the photo you wish to tag, and click on Add Note. You can drag the note around the required position on the photo, and you may also delete or edit it at a later stage.

Editing your photos

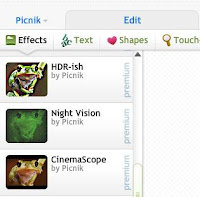
In 2007, Yahoo! announced its partnership with Picnik, a web-based photo editing application, and it was integrated into Flickr. By clicking on the Edit Photo tab, Picnik will open and allow the user to access its editing features. These include:

Basic editing: Lets you perform basic fixes to your photos, such as rotating, cropping and sharpening of a photo. Click on the Edit Tab;
Basic effects: Allows you add simple effects, such as Black and White, Sepia, Colour Invert, Tint, etc. Click on the Create Tab and then on Effects;
Add Frames: Lets you add novelty frames to your photos. Click on the Create Tab and then on the Frames Tab;
Advanced effects
: More advanced special effects, created by clicking on the Create Tab and then on Sandbox Tab.


Viewing your photos and sharing them with others

After you have tagged and edited your photos, you may wish to share them with your friends. First, click on the View as Slideshow icon in your Photostream, to see how your pictures will look on your friend’s PCs. Then, if you are happy with the results, click on the share icon (either in your Photostream or, if you are in Slideshow mode, it will prompt you to e-mail your photos to your friends at the end of the show). Basically, what your friends will receive is a link to your Photostream. Add your friends’ e-mail addresses (separated by a comma) or just copy and paste the link and use your regular e-mail account to send the link over.

For more information about Flickr and its many uses, click on the following links:

http://flickr.com
http://www.picnik.com/
www.flickr.com/help/
http://en.wikipedia.org/wiki/Flickr

Monday, February 9, 2009

Avatars

What is an Avatar?
An avatar is a graphical representation of oneself, or, in other words, a picture which represents the user. It can be similar in appearance to the user who created it; or it could be totally different, like an 'alter ego' of oneself. Avatars can be static or animated.

In Hindi, the word Avatar means...

"...the descent of a deity to the earth, in an incarnate form,
or some manifest shape..."

Most commonly, Avatars are used in Internet forums, social networking sites (such as Facebook or MySpace) or as e-mail signatures. More recently, users of Nintendo Wii have been creating 'Mii's' (Nintendo's version of Avatars) to represent the different players.

The simplest way to create an Avatar is to log onto websites which let you design, download and paste the graphics - all in a few minutes. Avatars can be saved by right clicking on the graphic and choosing "save picture as" (and saving like any other regular picture off the Internet) or else by copying and pasting the code (which is automatically generated by the website).


2D Avatars: DoppelMe

One of the most user-friendly freeware Avatar creators I came across is Doppelme.com. It lets you create a basic 2D Avatar and since the picture generated is a .Gif file, it can be uploaded practically anywhere.


Log onto http://doppelme.com/, and sign in the first time you use the website. When you sign in, you will be asked to submit an active e-mail address. After registration, open your e-mail account (the one you used to register) and click on the activation e-mail. Now you are ready to start your Avatar! Choose whether you want your character to be male or female, give it different facial expressions and hair colour and dress him/her up as you fancy. When you are ready, save your changes and copy the picture by right clicking on it and saving it onto your hard disk. Alternatively, copy and paste the code onto your personal website, blog or social networking page.


3D Avatars: Voki

As with everything else, simple 2D (static) Avatars have evolved into animated,
talking graphical representations, again created with incredible simplicity but with amazing end results. One such 3D Avatar creator is Voki. To log in, go to http://voki.com/.

As with DoppelMe, sign in the first time you log onto the website and you will be sent an activation e-mail. Click on the link in the e-mail to start your new Voki.

Upon entering the website, one notices several differences from the previous 2D Avatar-generator: the main difference being, of course, that the graphics are animated! There is a much wider choice of characters to choose from: not just male or female, but even popular animals such as cats or dogs. Simply click on 'Customise Your Character' to start editing your character.

Backgrounds, too, can be either static or animated; and again there is quite an impressive array to choose from. And if the offered selection isn't enough, one can choose to upload a picture from the hard disk to use as a background picture.


Giving A Voice To Your Avatar

Perhaps the best feature of Voki is the ability to give a 'voice' to your character. There are various ways to do this: the simplest being typing the words and clicking on the Text to Speech button (the 'key' icon'). Voki will 'voice out' what you have written (and it lets you choose which character will read it out too). Alternatively, click on the record button (microphone icon) to record a simple .wav file to attach to your character or if you have previously recorded a sound, click on the open button to locate the file on your computer.


Since Voki creates animated Avatars, it is not possible to just copy the graphic; however it lets you copy and paste the code (you can even choose which kind of code you require; be it for Blogger, Wordpress, Hi5, etc). It also lets you share your Voki with friends by sending it in an e-mail link.

For more information about 2D and 3D Avatars, go to :