Wednesday, January 13, 2010

Kindersite: Where Children Play and Teachers Learn


As from this scholastic year (2009-2010), desktop PCs have started to be introduced in the Kindergarten classes in Malta and Gozo. Apart from the software which comes pre-installed on the Desktops, the Internet connection in the classrooms mean that the Kindergarten teachers also have a vast array of online educational games available freely to them. There are many excellent sites to choose from, and I will be dedicating some of the articles of this blog to them. The first site that I would like to talk about was recommended to me by a good friend (and experienced Kindergarten teacher from Fgura Primary) Miriam Schembri: Kindersite-Where Children Play and Teachers Learn.

Kindersite is a portal aimed at children who attend Kindergarten and the early years of Primary schools (3-6 years of age), plus a special section for older pupils (7-12 years). The site has thousands of links to the best stories, songs and games for young children. It also allows teachers to create individual children's profiles, so that the children's favourite sites and games can be individually bookmarked. It is best if the teacher registers first to the site, to be able to use all of its features. The site can be found at http://kindersite.org/, and to register, simply click on the right hand side of the page on the link that says 'New Users Register Here'.

Children's Directory

Upon loading the websites, at the top of the screen, two link buttons capture the children's (and teachers') attention: Children's Directory and Educational Games 7-12 Years. The former contains links to young learners' games, stories, lullabies and songs; the latter has educational games from slightly older students (up to 12 years of age). The Children's Directory has literally thousands of links for educational games, online story books and favourite children's rhymes. One can easily navigate between one category and the next; and each site has an icon (small graphic from the site) and short description about the activity. The interface is pretty easy to navigate, even for younger children.

Educational Games

The educational games section has links for slightly older students (7-12 year olds) and covers a wide array of online apps suitable for students from Primary to Early Secondary levels. Some links worth mentioning are for Dvolver Movie Maker, for creating short, animated videos, and Tag Galaxy, a flash application which allows you to search and browse through Flickr photos in 3D graphical rendition.


News Column

The news section contains news related to the website, including latest additions (such as the newly added Lullabies section), and articles both from the Kindersite Staff and also from renowned educators from all over the world. From the news section one can also access and print Kindersite Fliers and Surveys, and add oneself to the site's list servers.

Kindersite Projects

Kindersite have also been recently endorsed by the European Community, Directorate-General for Education and Culture for 14 projects in education. There are 14 projects in total, including Language Learning projects and EduComics, a projects which focuses on the use and creation of Comics in Education. More projects can be accessed from the Projects section.

To browse through the myriad of resources, materials and projects available on the site, don't forget to login and register on http://kindersite.org

An essential for the Kindergarten and Primary classrooms!

Friday, January 8, 2010

World of Tux

Many of you might have heard of Tux Paint, a free, open source, bitmap graphics editor. In a few words, it is s simple paint/drawing program, available for free download from its creators. The term open source also means that the software's code is also freely available for users to develop.

Tux Paint's simple interface and bright colours has captured the attention of children and teachers alike. Apart from Tux Paint, two other programs are available for free download from the same developers: Tux of Math Command and Tux Typing. The former is a simple arcade-style game for learning Mathematics; the latter is a typing tutor for children.

The First Step: Tux Paint

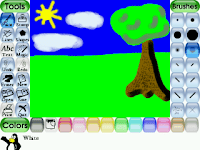
Tux Paint has been previously pre-installed on both the teachers' laptops and the classroom desktops; hence, it is already available for both the teacher and the students alike. Upon loading the software (which can be run either as full-screen or windowed), the canvas will load up, with the Tools on the left hand side, the Actions on the right hand side, and the Colours at the bottom of the screen. The Drawing Tools available include:

Paint: For free-hand drawing. One can also choose the size and shape of the brush stroke from
the Actions on the right hand side of the screen, or the brush colour from the bottom.
Stamps: Ready-made stamps can also be inserted by clicking on the stamps icon on the left, and then scroll amongst the different stamps that appear on the right. The stamps can be made to look bigger or smaller by clicking on the size bars, just underneath the pictures on the right.
Lines: To draw straight lines. The sizes can be chosen from the right.
Shapes: Select this tool to create shapes (solid or empty shapes can be selected from the right).
ABC Text: Allows one to type letters on the keyboard, which appear directly on the canvas (fonts can be chosen from the right).
Magic: A special effects wand, to enhance and embellish existing drawings. The different options can be chosen from the right hand side, and include special effects such as creating smudges, waves, TV effects, mirror images, etc.
New: Opens a new canvas to work upon.
Undo and Redo: Undo/Redo actions.
Eraser: Rubber Tool.
Save: Saves current canvas.
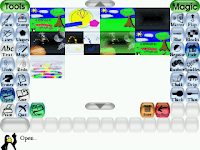
Open: Opens a previously saved canvas.
Print: Prints your current canvas.
Quit: Quits the program.

Tux Paint, and additional Tux Paint Stamps, can be downloaded freely from http://www.tuxpaint.org/download/.

Next Step: Tux Typing

After the students have started gaining more eye to hand co-ordination and mouse skills, it will be time to pass onto some keyboard skills with the use of Tux Typing. Tux Typing is a graded typing tutor, especially
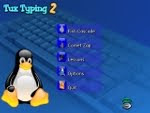
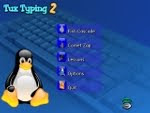
created for young children. Upon loading, you will be greeted with a choice of 3 games: Fish Cascade, Comet Zap and Lesson.

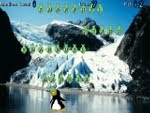
Fish Cascade: The Penguins are hungry! Hungry for letters and for words....Choose a level (easy, medium and hard) and choose the type of letters or words that are falling down from the sky - they can be single letters, simple or long words, or specific words such as names of colours, animals, etc. As soon as the letters appear on the screen, hit the letters on the keyboard to complete the words - and feed the Penguins at the bottom of the screen.

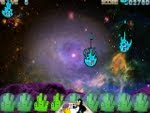
Comet Zap: Comets are falling from the sky, and you have to prevent them from hitting the Penguins! Depending on the level chosen (Space Cadet, Pilot, Ace or Commander), the comets will rain down with varying speed and hit the poor Penguins, unless you hit the relevant key on the keyboard and save the day. Once again, one can choose between just having falling letters or whole words for older students.

Lessons: The Lessons are simple keyboard drills for children, once again, with varying degrees of difficulty. There are 43 lessons in total.

Apart from these three different games, one can also, from the Options in the main menu, change the word lists, setup languages, etc. Tux Typing can be downloaded from http://tux4kids.alioth.debian.org/tuxtype/download.php.

Last Stop: Tux of Math Command

Last but most certainly not least, in the Tux saga, is Tux of Math Command, which is aimed at slightly older students (at Primary Level) and offers a variety of arcade-style maths games for teaching of Mathematics. Play can either be
in One Player or Two Player Mode (the latter offers a chance for collaboration between players). The games all center around the same main objective: that the students are given simple training in number works, starting from basic number recognition to more advanced sums (addition of two 2-digit numbers). A number, or a sum (depending on the level chosen) will appear on the screen, and the children must click on the correct number on the screen and press the space bar to activate their answer.

Being open-source, Tux of Math also has the facility to allow the more advanced users to edit the sums and number patterns and create customised games for their students. For more help on editing the games, and for downloading the game, go to http://tux4kids.alioth.debian.org/tuxmath/download.php.

These three applications are all freeware and open-source (and hence, open for development for the more advanced users) and are available for download on the website http://tux4kids.alioth.debian.org/. Specific developer information, and additional information on Tux Paint (including downloading of additional stamps) can be found on http://www.tuxpaint.org/.

Thursday, October 29, 2009

SuperLame


Ever seen a rather serious looking photo of someone you know, or indeed yourself, and wish you could lighten it up a little with speech bubbles? Or indeed, create a comic strip with your favourite pictures? Now there is a Web 2.0 application that is easy to use and can do just that: BeOriginal's SuperLame.

SuperLame is a simple tool which allows the user to quickly add speech balloons to their favourite pictures. It was created using Adobe's Flash CS3 and makes use of ActionScript 3.0. SuperLame can be accessed on http://superlame.com and requires no registration or sign-up. Upon loading, click on the large blue icon on top, Start Here, and let your project begin.


Step-by-Step to Comic Creation
  1. First, you need to upload your first photo. Do so by clicking on the Upload Image tab on top, and choose your photo for editing. (NB: Remember to use re-sized versions of photos, and that your photos must be smaller than 2MB).
  2. Now that your photo has been uploaded, you can start adding speech bubbles by clicking on the Add a Balloon tab. Click in the center of the balloon and start typing your blurb. The balloon can be moved around the screen and positioned exactly where you want it. You may also change the style of your balloon (for example, you may opt for 'cloudy thoughts' balloons, or a more pointy variety to express astonishment, etc.). This is done by clicking on the icons surrounding your new word balloon.
  3. You can also opt to add a 'sound' effects by clicking on the Add Sound FX tab. This does not actually add a music file to your picture, but rather, it creates comic-book type words such as POWW and KABOOM !! to add more characther to your photos.
  4. Your photo can have a frame around it, and you can also choose to have a black, white or grey background for it as well. Both can be modified by clicking on their respective icons on the right hand side of the photo.
  5. Ready from your editing? Click on the Save Image icon on the top left hand menu bar. The image will be stored as a JPEG, ready to be saved or e-mailed to a friend. Or, if you feel so inclined, you may also opt to visit the Comic Shop, where you can order prints of your Comic Photos, stickers or even T-Shirts (all this obviously at a price).

Some Ideas for the Classroom

SuperLame requires no sign-up or registration, and is relatively easy to use, even for younger pupils. Photos can be downloaded directly from the camera to the website, and sets of photos can be manipulated in order to create a storyboard. SuperLame is not a photo-sharing website; users will not be invited to browse through other people's photo collections, thus making it safe for children as well.

SuperLame accessed at http://www.superlame.com

Friday, September 25, 2009

Imagination Cubed


Imagine two classrooms set in different countries - say one in Malta, one in the UK. Both sets of students are collaborating together on a project. They would like to create a drawing or a picture together, and have thought of using a regular drawing program, such as the ones already pre-installed on their desktops. However, conventional paint programs only allow people to work at a drawing asynchronously; for them to collaborate on the same picture it would require them to save a copy of the drawing and e-mail it back and forth to each other, until everyone has added their piece. This is often time-consuming and may not reach the desired effect in the end.

Enter the world of Imagination Cubed...one of the simplest, most user friendly collaborative Paint/Doodle Maker available online. Imagination Cubed allows multiple users to interact with the same drawing simultaneously. It is a simple flash engine which delivers fast performance and the ability for multiple users to collaborate together in real time. To start using Imagination Cubed, simply go to http://www.imaginationcubed.com/

Introducing Imagination Cubed


As soon as the initial animation has loaded, you will be presented with a plain Whiteboard Space and a list of options to choose from. By default, the Pen Tool will be activated and you may start doodling straight away. There is a set of tools which you can access from the Tools menu, which include:

  • Pen: To change the style, thickness and colour of your Pen;
  • Shapes: To insert shapers into your drawing. You may change the colour and the size of the shape by dragging one of its corners;
  • Stamper: A set of stamps which you can use - once again, you may change colour and size according to your doodle;
  • Line: Creates straight lines of different colours and thicknesses;
  • Type: Text Tool;
  • Background Colour: Change your doodle's background colour and/or texture.

Each drawing or doodle can be saved, printed and sent to other persons for review. These options are accessed from the File menu. Another handy option is the Replay button - which allows the animation to be replayed from the beginning. To the naked eye, your doodle may appear to be just that, a little drawing or doodle; but it reality what you are creating is a simple flash animation which can be replayed over and over again. This unfortunately leads to one of the downsides of the application: it doesn't allow you to import your own pictures into the doodle. You start with a clean slate and have to fill it up on your own.

Collaborative Tools

Up to this point, the drawing or doodle is technically still yours; meaning that it is still private and only you and your students have access to it. It is only when you are ready to share it with the rest of the world that your doodle becomes public: by inviting people to collaborate on it. This can be done by clicking on the Invite a Friend tab at the top right hand side of the screen.

A dialog box will pop up requesting your name and e-mail address, and also the name and e-mail address of the person/s with whom you wish to share your doodle. After you hit send, your 'friend' will receive an invitation to view and join your drawing. The person must open the e-mail, click on the link, and be transported into your doodle, where he or she can just watch you work on your project or work together with you, in real time. Your name and the name of your friend will appear on top of the Pen, so that everyone can see what the other is doing.


When collaborating on a doodle, the Chat option will automatically activate, enabling users to chat while working together.

Using Imagination Cubed

One can think of several uses for using Imagination Cubed in the classroom...Some ideas are:

  • For collaborative projects, such as eTwinning, Eko Skola, Connectando Mundos, etc;
  • For collaboration between classrooms in the same school, especially in the early years;
  • For communication purposes between classrooms, to augment a regular chatting session;
  • For helping young students with their hand-mouse co-ordination skills;
  • For training on Interactive White boards;
  • For creating simple animations which can be shared and replayed over and over again...


This list, obviously goes on and on...only your imagination is the limit!

Imagination Cubed can be accessed on: http://www.imaginationcubed.com/

Monday, September 21, 2009

Using Technology With Your Students: AUP Forms


I think that to say that we live in the digital era would be the under-statement of the century. We are surrounded by technology all the time – wherever and whatever we clasp our eyes upon, in fact. Laptops have become as small as the palm of one’s hand. GPS’s have become widespread and most people wouldn’t dream of going abroad without one. Mobile phones, which, a couple of years ago served the sole purpose of placing a call from A to B, are now capable of shooting photos and videos on par with the most advanced digital cameras.

And, probably, that is where the problem lies. We are so used to all this technology and information pouring at us from all directions – be it from e-mail, websites, blogs or social networking sites – that we sometimes forget one of the basic rules of digital publishing: that is, never, ever, publish online photos, videos or details of persons without their previous knowledge or consent.

Digital publishing and social networking sites such as Wordpress and Facebook has made photo and video upload very easy – in fact, as easy as sending an SMS from our mobile. The mere fact that this task has become so increasingly simplified it does not automatically incur that the previous rules of Netiquette do not apply or have ceased to exist. On the contrary, since sharing and uploading of information has become so easy and widespread, I feel that we have been bestowed with an even greater responsibility. It is so easy to take a picture and upload it from our mobiles – a mere minute or two of ‘work’. But do we ever stop and think about whose photos we are putting online, and if that person would like to appear online after all?

The argument becomes even trickier when dealing with our classroom students. Our students are below the age of consent; it is their parents who make the decisions for them. And parents have every right in the world to refuse not only that their children appear online, but also that photos or videos are taken of their children, even if they are not intended for publication, digital or otherwise. Some parents are understandably afraid of ‘sharing’ their children with the outside world; others are surprisingly laissez-fair (but probably because they are not aware of the risks involved; an equally dangerous state of mind). But surely, we, as teachers, cannot keep track of all the photos taken by us – or indeed our students – and uploaded online, can we? Or should we?

The answer lies in a simple phrase, or form, as it were: The Acceptable Use Policy (AUP) form, which can be downloaded from http://skola.gov.mt/SKOLA/home/aup-qsc/AcceptableUsePolicy.aspx#AUPForm. It is our duty as teachers to ensure that each and every student in our classroom has had his AUP form signed and delivered. Never, ever take anything for granted. The most outgoing and cheery student in your class might not like being photographed, or his parents may object to the practice. It is not something worth taking the risk for.

If there is a good number of parents in a particular school which object to their children using the Internet or being photographed, it is also worth asking WHY this has happened. A great deal of misinformation that goes around is surely to blame; but mostly, it may be fear of the unknown…Parents may have a lot of questions going around their heads, such as…"Where will my child’s photos be published?”…and…"Is my child going to be supervised while surfing the Net?” These are all justifiable and acceptable excuses, but what can be done in order to counter-act them? Surely one cannot have a classroom website with half of the students absent, or their faces blotched out? What kind of classroom website would that be ??

I think I can safely say that, in this occasion, honesty is certainly the best policy. If there is a problem in your school or classroom – talk to the parents. Some of them are plain afraid of the unknown; others might have been drawn into the fear by other, more paranoid or misinformed individuals. Explain to the parents what are you going to do; where and why the photos will be used, the websites they will be uploaded on, etc. Re-assure the parents about Internet use in the classroom, too.

It is also worth directing the parents to one or two useful websites, such as CBBC’s Internet Saftey News on: http://news.bbc.co.uk/cbbcnews/hi/find_out/guides/tech/safe_surfing/newsid_1607000/1607213.stm, BBC’s Staying Safe online: http://www.bbc.co.uk/cbbc/help/web/staysafe and Kidsmart: http://www.kidsmart.org.uk/. Assure the parents you will be helping their children learn how to use the Internet safely and wisely.

There is a lot of good stuff going on the Internet, and a myriad of learning experiences still unexplored; but unfortunately, there is a lot of the bad stuff, too. The important thing is to know the difference. In the digital era, the uninformed human being is a very dangerous person to be around. Make sure that you – as a teacher – plus your students and their parents are well aware of the correct Netiquette to follow.


Some important websites to remember:

AUP Forms (Download Form & Explanation for Parents): http://skola.gov.mt/SKOLA/home/aup-qsc/AcceptableUsePolicy.aspx#AUPForm

CBBC Internet Safety News: http://news.bbc.co.uk/cbbcnews/hi/find_out/guides/tech/safe_surfing/newsid_1607000/1607213.stm,

BBC Staying Safe Online: http://www.bbc.co.uk/cbbc/help/web/staysafe

Kidsmart: http://www.kidsmart.org.uk/