 Flickr is an online photo and video management application, used for editing, organising and uploading digital images online. It was developed by Ludicorp, a Vancouver-based company that launched this application in February 2004. In 2005, both Flickr and Ludicorp were acquired by Yahoo! Flickr has since undergone many changes in both appearance and interface. The latest version (Flickr Gamma) was launched in May 2006.
Flickr requires a Yahoo! account to sign in, and it’s a free and easy way to share photos with friends. When logging onto the website, you will be prompted to sign in with your Yahoo ID, or, alternatively, create a new Yahoo e-mail account to be able to log onto Flickr.

Upon loading, you will be greeted with your own personal Flickr page. There are also various upload choices available, both for beginners and for more advanced users. One can upload:
- via the Flickr Uploader (available for both PC and Mac);
- via iPhoto, Aperture, or Windows XP plug-ins;
- via Flickr upload web page;
- via email via various free third-party desktop programs;
Uploading Photos (through Flickr Uploader) The easiest way to upload photos in Flickr is through its very own Flash uploader. When you sign in, you will see your Photostream on the top right hand side of the screen, and the Upload link on the top left. Click on Upload to start uploading your pictures in 3 simple steps: first choose your photos, then upload, and finally edit them. (After uploading, you will be able too see them in your Photostream – see above). When uploading, remember that you can decide who will see your photos: you can either make them public (can be viewed by anyone logging onto Flickr) or private (viewable only to those you choose).

Problems with uploading?
At times, you may not be able to work with Flickr’s flash uploader. This can happen for a variety of reasons: the most common being that you do not have the required flash plug-in or your Internet browsing security settings are set too high. If you do not wish or cannot rectify this, click on the basic uploader link which will let you upload your pictures in much the same way as you would send an attachment in an e-mail. Slow, but does the trick.
Tagging your photos Once your photos are online, you may wish to tag them. Tagging a photo means giving it a sort of label or short description, so that you or other persons may be able to search for the photo more efficiently. To tag a photo, simply select a photo in your Photostream and click on Add a Tag (on the right hand side of the screen; just underneath your photo’s thumbnail.)
While up to this point, this process is similar to other tagging features available on other photo management applications, Flickr can then take tagging into a whole new level: it lets you select parts of the photo and tag different parts of it with different words. For example, if you upload a photo of a street lined with houses, you would be able to tag each individual house and perhaps input the name of the family who inhabits it. The same goes for group photos: Flickr lets you pin-point the individuals in the picture, one by one.
 With Flickr, tagging becomes a visual process: the tagged parts of the photo will be encircled and the tags clearly visible on different parts of the picture, creating interesting compositions. This is known as adding notes. To add a note to an uploaded picture, simply click on the photo you wish to tag, and click on Add Note. You can drag the note around the required position on the photo, and you may also delete or edit it at a later stage.
Editing your photos
 In 2007, Yahoo! announced its partnership with Picnik, a web-based photo editing application, and it was integrated into Flickr. By clicking on the Edit Photo tab, Picnik will open and allow the user to access its editing features. These include:
Basic editing: Lets you perform basic fixes to your photos, such as rotating, cropping and sharpening of a photo. Click on the Edit Tab;
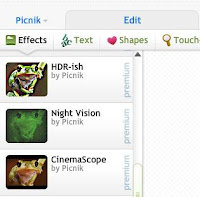
Basic effects: Allows you add simple effects, such as Black and White, Sepia, Colour Invert, Tint, etc. Click on the Create Tab and then on Effects;
Add Frames: Lets you add novelty frames to your photos. Click on the Create Tab and then on the Frames Tab;
Advanced effects: More advanced special effects, created by clicking on the Create Tab and then on Sandbox Tab.
Viewing your photos and sharing them with others
After you have tagged and edited your photos, you may wish to share them with your friends. First, click on the View as Slideshow icon in your Photostream, to see how your pictures will look on your friend’s PCs. Then, if you are happy with the results, click on the share icon (either in your Photostream or, if you are in Slideshow mode, it will prompt you to e-mail your photos to your friends at the end of the show). Basically, what your friends will receive is a link to your Photostream. Add your friends’ e-mail addresses (separated by a comma) or just copy and paste the link and use your regular e-mail account to send the link over.
For more information about Flickr and its many uses, click on the following links:
http://flickr.com
http://www.picnik.com/
www.flickr.com/help/
http://en.wikipedia.org/wiki/Flickr


