Showing posts with label Social Networking. Show all posts

Wednesday, November 10, 2010

Online Publishing: Issuu


Web 2.0 has changed the way that ordinary people look at the Internet. In the times of Web 1.0, the Internet was read-only, static, authoritarian: and most importantly, it was only the people who knew how to who could upload and share their information online with others. This has of course changed with the advent of Web 2.0 and a more collaborative, user-generated content web. Along the years, a number of online media repositories - some of course more popular then others - have sprouted on the Internet: for example, YouTube and Vimeo for online video sharing; SlideShare for presentations and documents; Picasa and Flickr for sharing photos, etc. The list is ever-growing, and the trick is to find something that not only works well for you, but, in the case of educators, works well in the classroom as well. Today I am going to take a look at Issuu, an online service that allows for realistic and customizable viewing of digitally uploaded material, such as portfolios, books, magazine issues, newspapers, and other print media.

Getting Started

The first step is, of course, registration: log onto http://issuu.com/ and click on Sign Up Now. It will allow for quick and easy registration, and then it will immediately allow you to find other users in your contact list who are using Issuu as well. This will allow even easier sharing of your documents with your friends. You will also be asked whether you want to view the introdoctory videos to get you started: here is the very first one which I have embedded here:


Uploading Your publications

Uploading a document on Issuu is relatively as easy as adding or sending an attachment by email: simply click on the Upload Document icon on the top right hand side of the screen, and then on Browse to choose your file. You will also be prompted to enter the title, description, keywords, and to choose a URL for your file. You can also select the document type, the recommended audience, language and target area. Other settings include whether or not the document will be public or private, and whether comments or ratings are allowed. Only after those details have been set will the system allow you to upload your document (which it does rather speedily). After uploading the document, you will be taken to My Library.


My Library

My Library is the place where all your uploaded documents will be featured. They will appear on
virtual Shelves and you will be able to organise and move your documents around on the different shelves.

The menu on the left hand side of the screen will help you to organise your work, and your friends' work, in a way that is easily recognisable for you. This is because Issuu, being a document repository and social networking site, allows you to add "friends", join groups and follow other people's updated publications. There is also a handy internal mail which you can use to communicate with your Issuu friends.

From your library, you can also grab the relevant links and embed codes in order to be able to embed the document into a website. In order to do this, follow these simple instructions:

  1. From your Home Page, click on My Library.
  2. Choose from your shelves the document you would like to work with.
  3. Click on Embed on the top right hand side of the screen. Choose the type of code you want to work with - HTML, Blogger, Wordpress etc.
  4. Scroll down and customise other settings, including layout, size, colour and theme, whether you want icons to appear on screen, whether your publication will be flicking automatically from one page to the next, etc. As soon as you are happy with your settings, click and copy the Embed Code itself from the top right hand side of the screen.
  5. Paste the Embed Code onto your blog or website.
Below is a simple tutorial about My Library, and how to organise your publications and embed them onto any website:


Visitors to your website will be able to either flick through your publication on your very website or blog; or else they can choose to be re-directed to your Issuu profile, and look at your other work, too.

Your Friends and Other Publications

The scope of Issuu is not only to upload your favourite publications for ease of sharing: you will also be able to browse through what other persons have uploaded. Publications are categorised and tagged for ease of reference. You will be able to browse through educational, inspirational, and many other types of publications by clicking on the Publications tab on the top left hand side of the screen. By adding your friends as contacts, you will be able to follow what they are uploading themselves and communicate with them through the internal emailing system.


To start using Issuu, go to http://www.issuu.com and create an account. Get publishing :)

Thursday, June 17, 2010

Wetpaint Wikis (2): Adding Stuff to Your Wiki

When a person creates his or her own personal Wiki, be it for personal or for work use (for example, having a classroom wiki so that both students and parents will be able to access their work from anywhere), it is important to start updating it regularly and keep it interesting for the site visitors. A Wiki can be seen as a sort of template which can be filled up collaboratively; it is alive and dynamic and ever-changing. Unlike a Blog, a Wiki can have several pages, and each page can have its own individual layout. Usually the first page is called 'Home'; that is where you write your introduction - the scope of your Wiki - and then you can have a series of pages linking to that home page.


But before we start talking about editing, a more important question arises: that is, Who is going to be responsible for the edits? Just because you have created a wiki, it doesn't automatically follow that everyone in the world will be able to view or edit it. Public wikis exist of course - the most common example is Wikipedia, which everyone can edit. We, as teachers, deal mostly with young learners, and safety online is often a huge concern of ours. You may want to have a Wiki which everyone can see and join in, but which only yourself and your students (or those whom you invite) can do the edits. You may wish to moderate discussions. Either way, the first thing to do after you create your wiki is to think about Permissions.


Site Settings

Before you start editing, it is important to take a look at your Site Settings. Click on Settings at the top right hand corner of the screen to access your wiki settings. We will go through them one by one in the order in which they appear.


  • Communications: This is where you set your site greetings, messages and notifications. You can also set a profile template for your members to fill in.

  • Templates: This is where the different page templates are. These are similar to MS Word or Powerpoint templates, and you can even customise your own.

  • Name and Logo: Change your site name (logo) and description.

  • Styles: Change appearance or site theme from here - you can choose from a selection of styles to suit the mood of your wiki.

  • Statistics: You may opt to have an analytics widget installed, such as Google Analytics or SiteMeter. These help to keep track of who visits your site.

  • Permissions: Although this is the tab before the last, its one great importance - for this is where you can manage who can view and/or edit your wiki. There are 3 levels of security regarding who will be or not be able to edit your site:
    Everyone, even anonymously - basically your wiki will be open to all, and everyone will be able to post, reply to discussions, comments, etc.
    Anyone who joins your site: There are no anonymous edits allowed, but anyone who joins the site can edit or add pages on your site.
    Only people I invite: There are no anonymous edits allowed, but anyone who joins the site can edit or add pages on your site.There are separate settings for posts and threads. The level of security you use will be determined by what you want to use your wiki for.

  • Backups: Wetpaint allows you to back up the contents of this site by exporting the pages as HTML into a zip file.This process may take a while, especially if this site is large. Backups are important especially if you are writing your information directly onto your Wiki and not, for example typing first into a word processor and then copy and paste your text. REMEMBER: A Wiki is a cloud computing application, and therefore, all the information is stored on servers several hundred miles away from your home. If something happens to that server and you haven't backed up your work, all your data will inevitably be lost - so BACK UP regularly!

Adding Pages


After taking care of the settings, you can start adding pages to your wiki. On the left hand side of your screen you should see the navigation menu. If you haven't added any pages yet, there will be your Home page at the top. Click on Add a new page to have additional pages. You may choose from pre-defined pages (rather like we choose content layout slides in Powerpoint: You can have blank pages, calendar-of-events type of pages, etc. Remember to give a suitable name to your page - short and self-explanatory. Once added, pages can be changed or deleted by clicking on More Tools on the Edit Toolbar.


The Edit Toolbar


As the name suggests, the Edit Toolbar is the place where you will be doing all the editing. After inserting your pages, click on the page you wish to start editing and click on Easy Edit. The Easy Edit Toolbar will pop up, and you can start editing your page by simply clicking on it. You will notice all the familiar icons: Bold, Italics, Underline, Font Name, Spellcheck, etc. Apart from text, your page may contain Photos, Videos, Widgets and/or Content Modules.


Photos and Videos


Click anywhere in your page (whilst in Easy Edit mode) to insert a photo or video. Photos are pretty straight-forward. In the case of videos, you may opt either to upload a video from your PC or else one which resides on a remote server, such as YouTube or Google Video. In the case of YouTube/Google, all you have to do is click on the Video icon, and then on Add by URL OR Embed. Copy the video's Embed Code from the source and click on Add YouTube Video. Once you add your video or picture, you will be able to adjust its size and orientation. In the case of videos, you will only be able to play them when you exit Easy Edit mode.The photos and videos you upload will also be visible in the Photos and Videos pages (accessible from the top menu bar.) The Photos and Videos pages also offer the opportunity to create photo and video albums.You may also opt to add other widgets or videos from other sites other than YouTube or Google - but this, together with the Content Modules, will be dealt with in the next post :)


Now...What Next?


Well, creating your very own Wiki of course! You have more than enough to get you started with your wiki project. You can also access one of my previous posts, an Introduction to Wetpaint Wikis, at http://teachersandcomputers.blogspot.com/2010/04/introducing-wikis-wetpaint-part-1.html, to refresh you memory. Log onto http://wetpaintcentral.com/ to start off. Have fun :)

Thursday, April 22, 2010

Introducing Wikis: Wetpaint (Part 1)


Until not very long ago, if a person or an organisation wanted to create a webpage or website, they generally asked someone else to do it - someone with the knowledge required to create and upload it. One needed to know how to use web-authoring software, perhaps a bit of programming and most importantly, one needed the physical online space to upload a website. This was in the era before we started to talk about Web 2.0 and cloud applications, of which Blogs and Wikis are a prime example.

A blog - or Web-log - is on online diary where people post diary entries about their personal experiences or talk about things that interest them. Blogs became popular because of the ease with which people could upload their posts - usually requiring little more than simple word-processing and e-mailing skills (typing, uploading of photos, attaching files). Popular blog hosting websites include Google's Blogger and Wordpress. Below is a short video which explains in simple layman's terms what a blog is all about:


Another popular and relatively easy way of publishing online material is through the use of Wikis. A Wiki is similar to a Blog in terms of accessability and usability, however it encompasses much, much more. For starters, whilst Blogs are usually made up of one 'page', where a person uploads his or her own personal 'diary' (with the posts appearing one after the other in chronological order), Wikis are usually more complex and are made up of many pages and sub-pages. Furthermore, Blogs are inteded to be used as online diaries, usually maintained by one or a very selective group of people. On the other hand, Wikis are not inteded to be led by just one individual; they have a much greater emphais on collaboration and are regarded as a social interaction and networking tool. The popular online encyclopedia Wikipedia is a prime example of a Wiki in practice: thousands of collaborators from all over the world have joined the site and collaborate regularly on articles to create this vast web-based, collaborative, multilingual encyclopedia project. Perhaps two of the most popular Wiki sites (especially with Educators) are Wikispaces and Wetpaint. Both sites provide free, online hosting and allow users to create simple websites in a matter of minutes. Today I am going to take a look at the basic features of Wetpaint Wikis: below is a short video which gives an overview of what can be done with it:


Wetpaint: Creating an Account

Like with any other online service, the first thing to do is create an account: go to http://www.wetpaintcentral.com/, click on the large green GO! icon and sign up (if its the first time you access the site) or Sign In if you already have an account. You can also opt to sign in with your Facebook, Twitter or Live account. Once your Wetpaint account is activated, you will be able to register and sign in not only on your own Wiki (which you can create from Wetpaint homepage) but also sign in to other public or private wikis (one to which you have been invited to). After creating your username or signing in, all you have to do to create your wiki is go to Wetpaint Homepage (http://wetpaint.com), enter a site name on Name Your Site, enter your chosen URL on Choose URL, and you are ready to create your own website in minutes.


Basic Features and Navigation

Upon loading, your Wetpaint site should look something like this:


You will notice your Site Name on the header on top; and a list of menus at the bottom of this header. This is where you can make changes to your wiki. Below is a list of the menus and what they do:
  • Home: This will take you back to your Home page (easy!) To add additional pages to your wiki, you must click on Add a new page on the top left hand side sidebar.
  • Discussions: This is where you post, reply to and follow discussion. To start a new discussion - Post Thread.
  • Photos and Videos: This is where you can upload photos and videos. Also, any videos or photos uploaded anywhere on the site will be available for viewing here as well. Photos can be grouped intogalleries; videos into Collections.
  • Updates: A summary of all the updates performed and by whom. Very very useful when doing a collborative job!
  • To-dos: Quite simply, a to-do list required for the page. If you want someone to do a particular edit, make sure to post a to-do on the page.
  • Droplets: These are basically widgets that you can add to your favourite social networking site or aggregator, so that you will be able to follow your wiki's updates more easily.
  • Members: A summary of the members of the wiki, with a list of page edits performed as well. By clicking on he member's names you can add them as friends and send them private messages.
  • My Profile: Change your profile details, view messages, compliments, manage your account.
  • Promote: Get tips on how to improve traffic on your site
  • Settings: Last, but most certainly not least, this is the place to change your site settings: from layouts, to templetes, to privacy settings and who can access and edit your site.

Inviting Collaborators

The Scope of having a Wiki is not to build it yourself, but to have collaborators who together work to create a common website. At a basic level, one can have three types of Wikis: A wiki which everyone can edit, even unonimously (100% public); a wiki which only members can edit; or a 100% private wiki, which members may only join by private invitation from an administrator. In the case of private wikis, there is also the added advantage of it being relatively ad-free. Unfortunately at the time of writing this post, the invitation feature for private sites is temporaly disabled; therefore to invite people to join your site, temporarily put the site as "public", share the site's URL with your collaborators, and ask them to click on the Sign Up icon at the top right hand corner of the screen. As soon as everyone has joined, the administrator can put the site back on Private.

In this first part we have only just touched on the basic features of Wetpaint WIkis: What they are, how to create them, and how to invite collaborators. The second part will include more information on how to build up your wiki by adding pages and widgets. Stay tuned :)

Sites to remember:


Monday, September 21, 2009

Using Technology With Your Students: AUP Forms


I think that to say that we live in the digital era would be the under-statement of the century. We are surrounded by technology all the time – wherever and whatever we clasp our eyes upon, in fact. Laptops have become as small as the palm of one’s hand. GPS’s have become widespread and most people wouldn’t dream of going abroad without one. Mobile phones, which, a couple of years ago served the sole purpose of placing a call from A to B, are now capable of shooting photos and videos on par with the most advanced digital cameras.

And, probably, that is where the problem lies. We are so used to all this technology and information pouring at us from all directions – be it from e-mail, websites, blogs or social networking sites – that we sometimes forget one of the basic rules of digital publishing: that is, never, ever, publish online photos, videos or details of persons without their previous knowledge or consent.

Digital publishing and social networking sites such as Wordpress and Facebook has made photo and video upload very easy – in fact, as easy as sending an SMS from our mobile. The mere fact that this task has become so increasingly simplified it does not automatically incur that the previous rules of Netiquette do not apply or have ceased to exist. On the contrary, since sharing and uploading of information has become so easy and widespread, I feel that we have been bestowed with an even greater responsibility. It is so easy to take a picture and upload it from our mobiles – a mere minute or two of ‘work’. But do we ever stop and think about whose photos we are putting online, and if that person would like to appear online after all?

The argument becomes even trickier when dealing with our classroom students. Our students are below the age of consent; it is their parents who make the decisions for them. And parents have every right in the world to refuse not only that their children appear online, but also that photos or videos are taken of their children, even if they are not intended for publication, digital or otherwise. Some parents are understandably afraid of ‘sharing’ their children with the outside world; others are surprisingly laissez-fair (but probably because they are not aware of the risks involved; an equally dangerous state of mind). But surely, we, as teachers, cannot keep track of all the photos taken by us – or indeed our students – and uploaded online, can we? Or should we?

The answer lies in a simple phrase, or form, as it were: The Acceptable Use Policy (AUP) form, which can be downloaded from http://skola.gov.mt/SKOLA/home/aup-qsc/AcceptableUsePolicy.aspx#AUPForm. It is our duty as teachers to ensure that each and every student in our classroom has had his AUP form signed and delivered. Never, ever take anything for granted. The most outgoing and cheery student in your class might not like being photographed, or his parents may object to the practice. It is not something worth taking the risk for.

If there is a good number of parents in a particular school which object to their children using the Internet or being photographed, it is also worth asking WHY this has happened. A great deal of misinformation that goes around is surely to blame; but mostly, it may be fear of the unknown…Parents may have a lot of questions going around their heads, such as…"Where will my child’s photos be published?”…and…"Is my child going to be supervised while surfing the Net?” These are all justifiable and acceptable excuses, but what can be done in order to counter-act them? Surely one cannot have a classroom website with half of the students absent, or their faces blotched out? What kind of classroom website would that be ??

I think I can safely say that, in this occasion, honesty is certainly the best policy. If there is a problem in your school or classroom – talk to the parents. Some of them are plain afraid of the unknown; others might have been drawn into the fear by other, more paranoid or misinformed individuals. Explain to the parents what are you going to do; where and why the photos will be used, the websites they will be uploaded on, etc. Re-assure the parents about Internet use in the classroom, too.

It is also worth directing the parents to one or two useful websites, such as CBBC’s Internet Saftey News on: http://news.bbc.co.uk/cbbcnews/hi/find_out/guides/tech/safe_surfing/newsid_1607000/1607213.stm, BBC’s Staying Safe online: http://www.bbc.co.uk/cbbc/help/web/staysafe and Kidsmart: http://www.kidsmart.org.uk/. Assure the parents you will be helping their children learn how to use the Internet safely and wisely.

There is a lot of good stuff going on the Internet, and a myriad of learning experiences still unexplored; but unfortunately, there is a lot of the bad stuff, too. The important thing is to know the difference. In the digital era, the uninformed human being is a very dangerous person to be around. Make sure that you – as a teacher – plus your students and their parents are well aware of the correct Netiquette to follow.


Some important websites to remember:

AUP Forms (Download Form & Explanation for Parents): http://skola.gov.mt/SKOLA/home/aup-qsc/AcceptableUsePolicy.aspx#AUPForm

CBBC Internet Safety News: http://news.bbc.co.uk/cbbcnews/hi/find_out/guides/tech/safe_surfing/newsid_1607000/1607213.stm,

BBC Staying Safe Online: http://www.bbc.co.uk/cbbc/help/web/staysafe

Kidsmart: http://www.kidsmart.org.uk/

Wednesday, June 24, 2009

Ning

Ning is an online platform, used primarily for creating private or closed social networks. Unlike other popular social networking applications such as Facebook or MySpace, which are open for all to join, Ning allows users to create private networks for a particular group of online users. The network can be kept as private or as public as the creator desires, and each member can be granted different permissions and given different roles in the general running of the network. Ning is being increasingly used in the educational field as both a tool and platform for collaboration. Users can opt to either take part in other members' social networks or create a network from scratch of their own.

Getting Started


To start exploring Ning, log onto http://ning.com. You will be immediately prompted to Sign In and to Create a new social network. You can choose a name for your network, and also the network's URL (they don't necessarily have to be the same). The URL is subject to availability.

Once you click on Create, you will be prompted either to log in with your existing Ning account or else sign in for a new membership.

Now you can really start customising your Ning Network. First, describe what your Network is going to be about, and choose a language and country.


Next, you can start adding, removing or simply moving your network's features. Decide on what shortcuts you need to have upon loading, and what comes before and after. Usually, it is advisable that the members' blog posts are visible immediately when one logs onto the network. The Network's latest activity should also be allowed a prominent space on the network. Another important consideration is whether or not you want to allow synchronous chat on the network.


The final stage is to customise your Network's appearance: choose a theme and customise the colours according to your taste. Click on Launch, and your new Social Network is ready to roll!

Getting Around

At first glance, a Ning network may seem less straight forward than say, Facebook, however if you are used to Facebook's interface you will soon get the hang of Ning. On the top there are a series of Tabs which open onto other pages: My Page, Blogs, Events, etc. Take some time to explore each page. But first, make sure to customise your personal page on Ning, by adding details, photos, etc. On My Page, you can also access your Network's Private Messaging (e-mail) and add other network members as friends. To view the other members of the network, click on the Members Tab.

The network's discussions can be found in the Forum page, and the Network's upcoming activities can be accessed from Events. In the case of Events, one can opt to have events which are open only to specific members of the network, that is, by invitation only.

Ning Networks allow easy uploading of both photos, videos and blog posts. Depending on how you arranged your page features during setup, the relevant pages can be found on the top tabs and also on the Main Page. Photos can be added by uploading the actual picture files; in the case of videos, you must copy and paste the video's embed code (such as a video from YouTube, TeacherTube or Vimeo). Each person can have his/her own blog on the network, and blog posts will appear both on the Main Page and on the personal page (My Page) of the person uploading the blog.

How safe is Ning?

You can have two roles on a Ning Network: the role of Administrator if you are logged into a network you have created yourself, or the role of Member if you can have been invited to join a network created by somebody else. Another important thing to take note of is that if you are the Network's Administrator, your interface will look slightly different that if you are merely a Member. If you are the network's administrator, you will of course have extra privileges and be able to re-arrange the network's elements. You will also be able to determine who does the edits, and, in extreme cases, ban persons from your network. Ning can allow you to have a 100% private network - that is, private except for the users who have been specifically invited and approved by the network's administrator. These security settings are of utmost importance if you are planning to use Ning with young learners.

Network permissions can be determined by clicking on the Manage tab, and then on to Members to define members' roles, and on Network Privacy to determine who can view and join your network.

The Administrator can also opt to change the tabs at the top of the page: thus re-arranging page elements and accessibility.

Ning Networks in Education


Ning has been used extensively in education, for collaboration purposes and for creating safe, private networks for students to work in. There are a number of good networks which illustrate how Ning can be used within the educational setting, both locally and abroad. Take a look at these two excellent networks, created by educators for educators...


For more information about Ning Networks, go to:

Friday, March 27, 2009

Vimeo


When talking about uploading and sharing of videos online, the vast majority of people automatically think of YouTube. However, YouTube is definitely not the only site which offers these online services. Another popular site (especially in the US) is Vimeo.

Vimeo is a video-centric social networking site, launched by InterActiveCorp in 2004. Its name, "Vimeo", is, in fact, an anagram of the word "movie". The site hosts around 13,000 video uploads daily, 10% of which in HD. Most notably, the White House regularly uploads HD versions of Barac Obama's broadcasts on Vimeo.

Although Vimeo is primarily used to upload videos, its core purpose is very different from that of YouTube. It is not commonly used to download music videos or cartoons or excerpts from movies. Vimeo is essentially a social networking site, where people of similar interests can create groups and upload instructional, demonstrative or simply entertaining videos. It offers a somewhat safer, cleaner environment in which to work with our students.

Getting Started

Although anyone can access Vimeo, it is always best to create an account first (otherwise you will find yourself locked out of many features). When signing in for the first time, it will ask you if you want to link you Vimeo account with your own Facebook account for convenience - I did, of course :) When you first log in, your display should look something like this...


On the top right hand side of the screen one can find the Menu Bar with a series of drop-down menus. Clicking on Me will allow the user to edit the Home Page, Profile, Settings and Contacts. The Me menu will also allow the user to engage in private messages and conversations with their contacts on Vimeo. From the Video menu one can, apart from uploading Videos, manage Albums, Groups, Channels and Subscriptions. Alternatively, to upload a video, simply click on the Upload menu.

Uploading Videos

To upload a video, simply click on the Upload Video button. Vimeo offers the user the possibility to upload up to 500MB of videos every week (including HD). Videos can be tagged so that they are labelled and more easily found. Altough it allows users to share videos and to download each other's videos, its rigid privacy settings mean that the users can decide if they want their video to be available for others to watch or download from the site, or not. In other words, uploaded videos can be kept totally secret from the general viewing public. Users may opt to use Vimeo purely to keep a backup of their videos.

This short screen cast was developed by the Vimeo team, and shows how one may upload a video and keep it private...


Additional Features

Below is a list of some additional stuff that can be done with Vimeo. To learn more about these features, click on the Explore menu on the top right hand side of the screen.

Groups: Creating a Group in Vimeo is like creating a mini community within Vimeo of people with common interests like yourself. Within a group users are able to share and discuss videos, music, photos, events, etc. (When searching Groups, I managed to find a good number of teachers' groups).

Channels: A simple way to showcase videos is to create a Channel where your viewers can watch your creations.

Projects:  Users here can discuss ongoing or future audio-visual projects they wish to embark upon.  It is also a sort of forum, where the users may engage in discussions about technical issues, requested features, general discussions about videos, etc.

Toys: Vimeo Toys are discovery applications that enable users to check out the latest videos and activity on the Vimeo service. Vimeo Land is a cartoon-style 2D world, while Pulse is one huge collage of all the videos being uploaded in real time. Users can actually engage in and create their own "Vimeo Toys".


As one can see, there is more to Vimeo than just uploading and sharing of videos. It is more of a specialised community of people who share videos and ideas with each other. It is very, very different from YouTube, and do take my word for it. It can be safely used to upload children's content videos online and embed them into a Blog or even on Skola portal. Try it out at http://www.vimeo.com/

Wednesday, February 18, 2009

Tagging and Uploading Photos: Introducing Flickr

Flickr is an online photo and video management application, used for editing, organising and uploading digital images online. It was developed by Ludicorp, a Vancouver-based company that launched this application in February 2004. In 2005, both Flickr and Ludicorp were acquired by Yahoo! Flickr has since undergone many changes in both appearance and interface. The latest version (Flickr Gamma) was launched in May 2006.

Flickr requires a Yahoo! account to sign in, and it’s a free and easy way to share photos with friends. When logging onto the website, you will be prompted to sign in with your Yahoo ID, or, alternatively, create a new Yahoo e-mail account to be able to log onto Flickr.


Upon loading, you will be greeted with your own personal Flickr page. There are also various upload choices available, both for beginners and for more advanced users. One can upload:
  • via the Flickr Uploader (available for both PC and Mac);
  • via iPhoto, Aperture, or Windows XP plug-ins;
  • via Flickr upload web page;
  • via email via various free third-party desktop programs;

Uploading Photos (through Flickr Uploader)

The easiest way to upload photos in Flickr is through its very own Flash uploader. When you sign in, you will see your Photostream on the top right hand side of the screen, and the Upload link on the top left. Click on Upload to start uploading your pictures in 3 simple steps: first choose your photos, then upload, and finally edit them. (After uploading, you will be able too see them in your Photostream – see above). When uploading, remember that you can decide who will see your photos: you can either make them public (can be viewed by anyone logging onto Flickr) or private (viewable only to those you choose).


Problems with uploading?

At times, you may not be able to work with Flickr’s flash uploader. This can happen for a variety of reasons: the most common being that you do not have the required flash plug-in or your Internet browsing security settings are set too high. If you do not wish or cannot rectify this, click on the basic uploader link which will let you upload your pictures in much the same way as you would send an attachment in an e-mail. Slow, but does the trick.

Tagging your photos

Once your photos are online, you may wish to tag them. Tagging a photo means giving it a sort of label or short description, so that you or other persons may be able to search for the photo more efficiently. To tag a photo, simply select a photo in your Photostream and click on Add a Tag (on the right hand side of the screen; just underneath your photo’s thumbnail.)

While up to this point, this process is similar to other tagging features available on other photo management applications, Flickr can then take tagging into a whole new level: it lets you select parts of the photo and tag different parts of it with different words. For example, if you upload a photo of a street lined with houses, you would be able to tag each individual house and perhaps input the name of the family who inhabits it. The same goes for group photos: Flickr lets you pin-point the individuals in the picture, one by one.


With Flickr, tagging becomes a visual process: the tagged parts of the photo will be encircled and the tags clearly visible on different parts of the picture, creating interesting compositions. This is known as adding notes. To add a note to an uploaded picture, simply click on the photo you wish to tag, and click on Add Note. You can drag the note around the required position on the photo, and you may also delete or edit it at a later stage.

Editing your photos

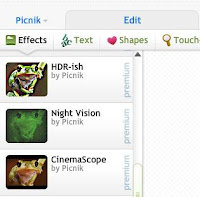
In 2007, Yahoo! announced its partnership with Picnik, a web-based photo editing application, and it was integrated into Flickr. By clicking on the Edit Photo tab, Picnik will open and allow the user to access its editing features. These include:

Basic editing: Lets you perform basic fixes to your photos, such as rotating, cropping and sharpening of a photo. Click on the Edit Tab;
Basic effects: Allows you add simple effects, such as Black and White, Sepia, Colour Invert, Tint, etc. Click on the Create Tab and then on Effects;
Add Frames: Lets you add novelty frames to your photos. Click on the Create Tab and then on the Frames Tab;
Advanced effects
: More advanced special effects, created by clicking on the Create Tab and then on Sandbox Tab.


Viewing your photos and sharing them with others

After you have tagged and edited your photos, you may wish to share them with your friends. First, click on the View as Slideshow icon in your Photostream, to see how your pictures will look on your friend’s PCs. Then, if you are happy with the results, click on the share icon (either in your Photostream or, if you are in Slideshow mode, it will prompt you to e-mail your photos to your friends at the end of the show). Basically, what your friends will receive is a link to your Photostream. Add your friends’ e-mail addresses (separated by a comma) or just copy and paste the link and use your regular e-mail account to send the link over.

For more information about Flickr and its many uses, click on the following links:

http://flickr.com
http://www.picnik.com/
www.flickr.com/help/
http://en.wikipedia.org/wiki/Flickr