Audacity is a freeware program typically used to record and manipulate audio files.
With Audacity you can take a project from start to finish, and the end result can be quite professional sounding too.
Its main features are:
- Recording of live audio;
- Converting tapes and records into digital recordings;
- Editing MP3, WAV, AIFF and other sound files;
- Cut, copy, splice, and mixing of sounds together;
- Changing the speed or pitch of a recording.
Ready…Steady…Record!
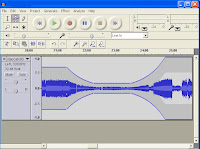
Recording an audio clip with Audacity is as simple as the click of a button. Upon loading, the basic controls can be seen on top of the page. Simply connect a microphone to your PC, click on the Record Button, get recording, and click on the Stop Button to end the recording. You can hear what has been recorded by pressing the Play Button. If you need to record additional segments – for example, if recording a Play or a Radio Programme - just hit the Record Button again and the new recording will be shown in a new channel underneath the original one.

The clips can be moved along the timeline by clicking on the Time Shift Tool and dragging the clip along.
The clips will be saved by default as .aup files, which are the raw Audacity files. In order to be able to hear them on other PCs or MP3 players, click on File > Export as MP3. When exporting to MP3, the program also lets you add tags and info (for example, the genre) which will be embedded into the saved file.
Importing an existing MP3 into Audacity
Apart from recording audio files, one can also import MP3 or WAV files for editing. Click on Project > Import Audio.
The newly imported file can be used in conjunction with a recorded voice file, for example to create a jingle for a podcast.
Audacity Editing Tools
Below is a list of Audacity's editing tools. The tools are described in chronological order (according to the way they appear on the toolbar).
- Selection Tool: Click on this icon to select part or all of the audio file
- Envelope Tool: Lets you change the pitch (loudness) of a selected clip
- Draw Tool: Zoom in until you can see the individual samples, and change the frequency of the samples
- Zoom Tool: Zoom in or out of your clip
- Time Shift Tool: Move clips along the timeline
- Multi-Tool Mode: Lets you use more than one tool at the same time.

Prosit Amanda....i'm sure it will be of great help to all of us.
ReplyDeleteMany thanks Amaaanda ;)
ReplyDeleteThanks a lot to everyone for their support...please feel free to suggest topics for future articles :)
ReplyDeleteProsit Amanda a much needed blog which can be utilised by many. Keep giving us more...!!!!!!
ReplyDeleteRose-anne
Hi Amanda! This blog is going to be of a great help for the project!
ReplyDeleteAmanda, Excellent. I'm glad I have you on board. I see that you have already linked to Antonella's and Lucienne's Blog. That is great. Let's get the team spirit running. It's one way of creating a community of learners.
ReplyDeleteThanks to EVERYONE for your support :) will get back to writing after I come back from PDW :)
ReplyDeleteGreat blog Amanda! I would like to link the eTwinning blog to this blog because eTwinners could find it very useful too! Keep up the good work... you are great.
ReplyDelete